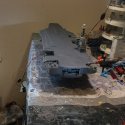
1/350 Scale USS Enterprise CVN-80 Ford Class Carrier

Jeff Head

General
Registered Member
So, now time to add the lights and get them turned on and working before gluing the deck down in place. Needless to say, the connections have to be proven and proven reliable...because once you glue that deck on, and it dries...it becomes a very difficult things to go back and fix it..

But, here's putting the lighting system together with the switch wired to outside the ship:

CVN80-090.JPG CVN80-091.JPG CVN80-092.JPG
 

Jeff Head

General
Registered Member
Then it was time to turn the vessel over and add the props, supports, shafts, rudders, and do a lot of touch up and adding of ships launches and other equipment that could best be reached from the underside.

CVN80-098.JPG CVN80-099.JPG CVN80-100.JPG
 

Jeff Head

General
Registered Member
Once that was done and painted up, then I wanted to dry fit the island again for a few pics:

CVN80-101.JPG CVN80-103.JPG CVN80-104.JPG
 
Last edited:

Jeff Head

General
Registered Member
I then added the landing strip markings to the carrier. I wanted to get these down and then covered with a couple of coats of dull coat finish to protect them.

CVN80-105.JPG CVN80-106.JPG

Then I spent the last three days detailing the island...she is looking really good now.

CVN80-107.JPG
CVN80-108.JPG
CVN80-110.JPG
 

Jeff Head

General
Registered Member
The island is still not glued down yet. I will finish all of the decals and markings on the deck (and there are a lot) before I do that, as well as adding all of the life rafts, and various fueling, fire, and UNREP equipment and detail. Then I will add the island and the auto landing maast you saw above.

Then I will add all of the markings and decals to the aircraft and place them on deck, and then add all of the personnel.

A couple of weeks to go yet...maybe more.
 

Equation

Lieutenant General
Then it was time to add some aircraft which I added markings and decals to along with some equipment. I will take two posts to show this:

View attachment 43267 View attachment 43268 View attachment 43269 View attachment 43271 View attachment 43272
Great job Jeff, it's like looking into the near future. I'm not her to nit pick your work but those planes seems a little grainy. Is their a way you could smooth it out by using sand paper...just curious that's all?
 

Jeff Head

General
Registered Member
Great job Jeff, it's like looking into the near future. I'm not her to nit pick your work but those planes seems a little grainy. Is their a way you could smooth it out by using sand paper...just curious that's all?
It's the 3D Printing process. IN order for them to print in the ultra-high mode, which makes them a lot smother, it more than doubles the cost...and I just could not afford it.

If I had the right equipment to sand blast them...and very gently so...I could do that too, but I do not have it. So, it is what it is.

The guy who did the Grumman aircraft did a better job as he modeled them from the start in 1/350 scale. The other guys with the Bowing design and the canards on the front end, he had a 1/700 model and just upgraded it to 1/350 and so it is not as smooth for that reason too.

Anyhow, the work continues!
 
Top